To post in the forums you will need to first register. All new members are welcomed, with one caveat: You must behave and be nice AND SEARCH BEFORE POSTING!
Christmas is over so I had a bit of time to myself today to get something done.
I want the bumpers assembled before they go down to Ed's, that way they just need to be bolted on so I started with this pile of bits;
The light bulb was an idea I had earlier Tongue
Brackets and over riders on;
First idea was to use the bumper bolts and mount the numberplate half way up the bumper;
Second idea was to mount it below the bumper;
Decided that it would be better looking if it was below the bumper so I had to start measuring the center points of the bumper and number plate and decide where I wanted to drill holes in the nice new number plate. With the measurements made I could make up a cardboard template for the mounts;
Transfer the shape onto some steel;
Cut out, bent and fitted;
With the number plate drilled in the right place I could transfer the location of the holes to the brackets;
And jobs a good'un.
Finished off by taking it all apart again to paint the brackets.
My all new film location website is here; www.rewoundandfound.com
Check oot ma flickr page; http://www.flickr.com/photos/route9autos/
For handmade jewellery, go to: http://www.weegemjo.co.uk
"Listen, it's too big a world to be in competition with everyone. The only person who I have to be better than is myself. And in your case, that's enough."
I had an overrider desire to try and better that joke but fendered off the temptation
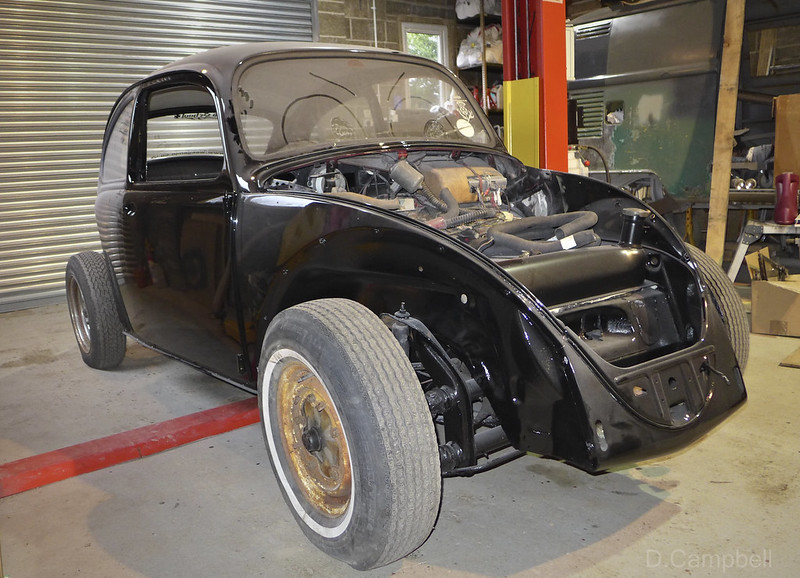
Todays plan was to take the wheels down to Ed's and get some work done on the car.
Part one of that plan was a fail however because it seems that while the tyres have been stacked up in the garage the sticky backed weights have stopped being sticky backed and need to go down to the tyre place to be re-fitted.
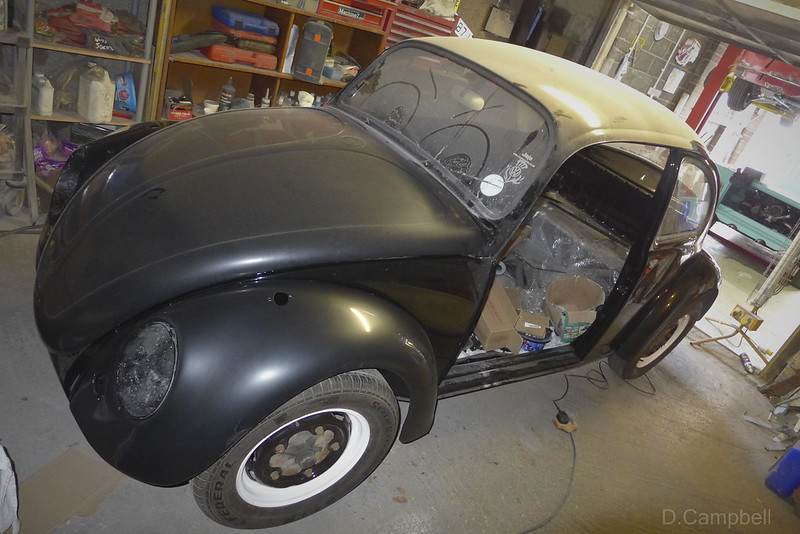
I went down regardless and when I got there was really pleased to see the drivers door fitted;
In the spray booth the bonnet, engine lid and passenger door have been top coated ready for colour sanding;
With the passenger door not fitted I couldnt get on with assembling the internals so I sorted out some wiring. These blocks had been fitted when the alarm was wired in so I removed the blocks and soldered the join;
Also had to add a live feed from the battery to the alternator;
This meant we could do this ;
She lives again....Woohoo.
My all new film location website is here; www.rewoundandfound.com
Check oot ma flickr page; http://www.flickr.com/photos/route9autos/
For handmade jewellery, go to: http://www.weegemjo.co.uk
When I got the wheels back the guys gave me a handful of extra weights and I marked the positions and weights of whats on the wheels so that if they fall off again (highly probable given the gloss on the powdercoat) I can re-apply them in the correct place;
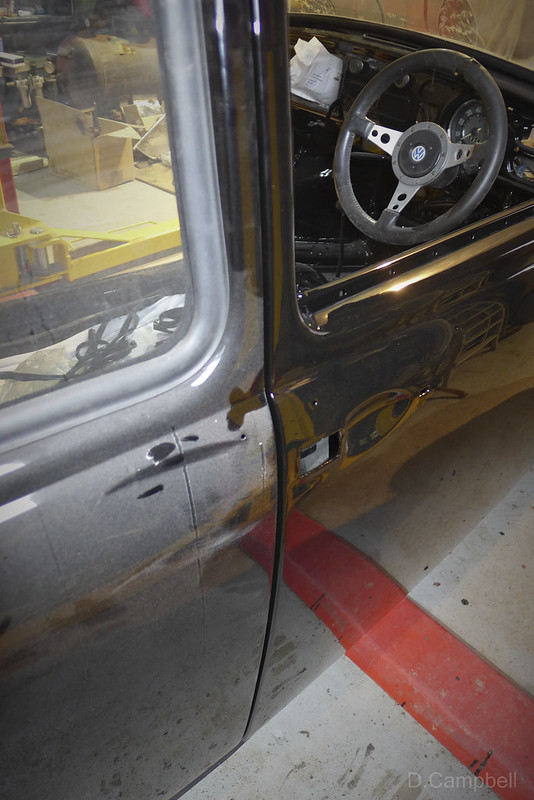
With the doors going back together soon the inner handles and window winders needed freshened up.
Thought about sourcing new parts in chrome but with the car being a 1967 the knobs (snigger) on the winder handles are one year only so I cracked out the satin black paint which should look good on the red door cards;
As you can see the wiper arms and rear view mirror got a paint while I was at it.
All being well Im going down on Sunday to get on with things.
Dave.
My all new film location website is here; www.rewoundandfound.com
Check oot ma flickr page; http://www.flickr.com/photos/route9autos/
For handmade jewellery, go to: http://www.weegemjo.co.uk
This is going to be a bittersweet project (for us following) as I am desperate (like you and others) to see the finale of the restoration project but at the same time, I'll be sad because I've followed this for sometime now and when it comes to that end - what will I do next?
Brilliant video of the engine being turned and so hoping to see the final results in due course. Well done!
"Listen, it's too big a world to be in competition with everyone. The only person who I have to be better than is myself. And in your case, that's enough."
Delmont St Xavier wrote:This is going to be a bittersweet project (for us following) as I am desperate (like you and others) to see the finale of the restoration project but at the same time, I'll be sad because I've followed this for sometime now and when it comes to that end - what will I do next?
Brilliant video of the engine being turned and so hoping to see the final results in due course. Well done!
Thanks. The speed the painter is going it will be a few more weeks before the last page of the story but I will know better if I get down tomorrow.
Big problem is I'm off to America for a driving adventure for 3 weeks in March so will it be done before I go? Who knows.
My all new film location website is here; www.rewoundandfound.com
Check oot ma flickr page; http://www.flickr.com/photos/route9autos/
For handmade jewellery, go to: http://www.weegemjo.co.uk
If going to America is going to be problematic for you, I'll take yer ticket and you can stay and do the car.....
"Listen, it's too big a world to be in competition with everyone. The only person who I have to be better than is myself. And in your case, that's enough."
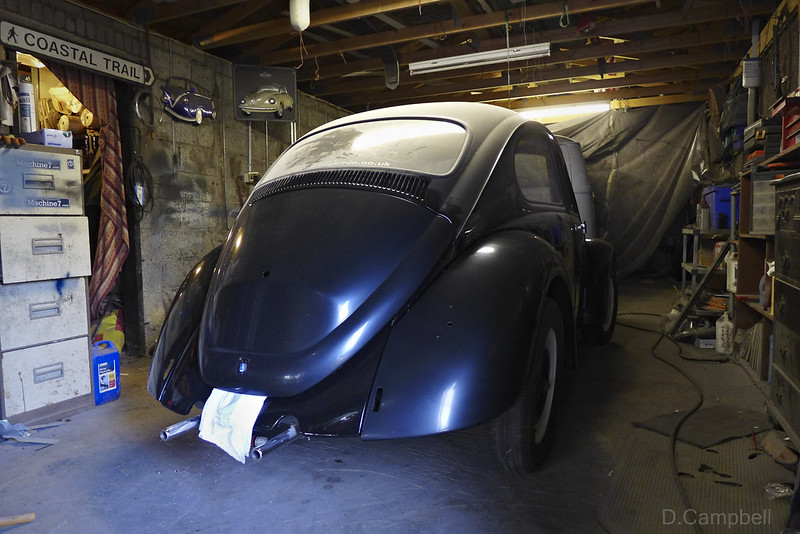
I was too cold to add yesterdays update when I got home last night so here is how Sunday went at the garage.
Car is looking good with the bonnet now in place but not yet polished.
Job one was easy enough, take off the monster truck tyres that Frank loaned me for the past few months;
With newly powdercoated wheels its important to take off the powder coat from around the wheel bolt holes;
If you skip that step, the bolt feels tight but as you drive for the first time the pressure removes the powdercoat and the wheel bolt can come loose.
Job done;
Now the bit I wasnt looking forward to, reassembling the door internals.
I got the outer scraper in but then the inner scraper fought back but eventually clipped in place. Then the 1/4 light frame chipped in for a punch up. I had the old 1/4 light with rusty outer frame and a replacement 1/4 light unit but it had a broken latch. To make one good one from the 2 required about an hour of battle. Had to drill out 2 rivets then spot weld the new one back together but got there in the end.
Started fitting the 1/4 light to the door and just when I thought I had it fitted I noticed the inner scraper hanging off and had to start again.
At this point I was too frustrated to be taking pictures so you will need to take my word for it.
After the 1/4 light was in its correct place I got the door seal, outer door handle, inner lock release and the latch on the B pillar in place before Ed gave me a hand to fit the glass.
The results, an assembled door with uppy downy windows that can be closed and locked.
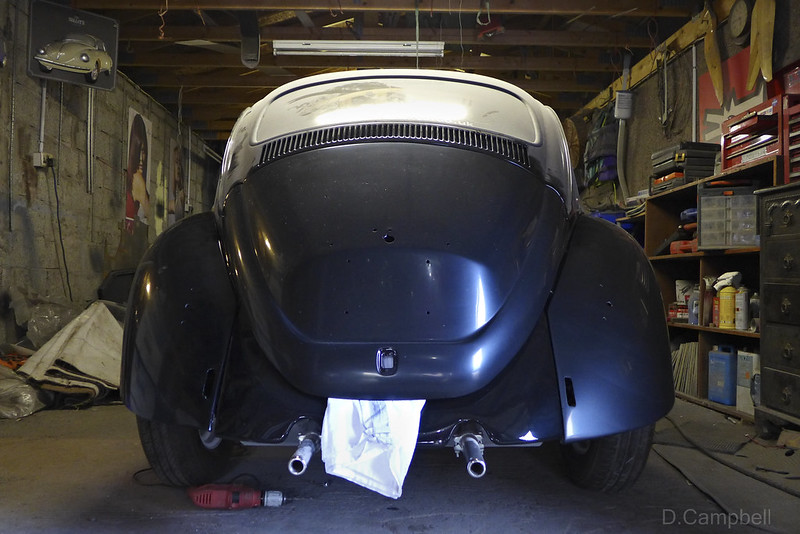
As a last detail for the night (you can see how dark it is by now) I fitted the rear view mirror;
Dave
My all new film location website is here; www.rewoundandfound.com
Check oot ma flickr page; http://www.flickr.com/photos/route9autos/
For handmade jewellery, go to: http://www.weegemjo.co.uk
I love it. I love those old head cloths on the cars, they were so easy to clean too. I used to clean my old Maestro with bleach then I moved on to Vanish bloc and it worked a treat. I also like the fact that the mirror is screwed on as one car I had the damned thing used to fly off when I went over a bump.
Great progress indeed!
"Listen, it's too big a world to be in competition with everyone. The only person who I have to be better than is myself. And in your case, that's enough."
The headcloths are great and being a sparkafer model, the most basic available the head cloth only covers a strip down the middle of the roof. Had it been a 1300 or 1500 model the headliner would extend down the B pillars and around the back windows. What most people dont realise is the air holes in the head cloth are only in certain panels, the rest like the section above are painted on.
HOT....HOT....HOT.... off the press.
Text came through from Ed at RodnTod restoration headquarters while I was out and I couldnt wait to get back to share.
FESTER HAS A FACE AGAIN Thumbs Up
And a bum;
These panels are still to be polished, that is why they look dull but they are easier to work with while bolted to the car.
Good work Ed and Johnny, really appreciate the late nights.
My all new film location website is here; www.rewoundandfound.com
Check oot ma flickr page; http://www.flickr.com/photos/route9autos/
For handmade jewellery, go to: http://www.weegemjo.co.uk
Its sometimes the small things in a restoration that give the most pleasure. I was summoned to Ed's on Friday to look at a small problem (more later) and while I was there I took this video of just how nicely the drivers door closes;
Absolutely perfect. No effort needed and a really satisfying thunk, Ed and Johnny got it spot on.
I also got to have a look at Festers bum now that the wings are loosely fitted;
The nearside wing was always the runt of the litter. It was obviously of a lesser quality to the others but you would never have known unless you got underneath to see the lack of return lip on the wheel arch so was fine to be re-used.
Problem is that when it was removed it must have sprung outwards slightly so when Ed and Johnny came to replace it, the tension needed to line up the bolt holes caused a very small crack. When I say small I mean tiny but it was right on the top of the wing and with it being black paint the light would have bounced right off the damaged area and it would have been pretty obvious.
This left 2 problems.
Many hours of Johnny's hard work were now down the drain and we needed a replacement wing from somewhere.
Day Mouldings was the first point of call. Widely regarded as the best fibreglass wings but they have a waiting list of 2-4 months. Not good.
Had an ask around the usual suspects and drew a blank (thanks to those who took time to look in their stores).
Then, at the last minute Ed made a call and thanks to Gayle, we had a wing and she even delivered it that night to Ed's. Thanks Gayle, lifesaver.
So the moment of truth;
Perfect. It just needs to be not yellow and more black.
Quite how angry Johnny is with the old wing remains to be seen.
So the work is back on track, just one more hole to be filled;
I wasnt needed at the workshop this week as Johnnys work is ongoing but even though I wasnt down there are still updates to share.
I now have nice clean seatbelts to go in. Found the pair, brand new on ebay for less than £30. Not bad when they are £40 per side on Heritage and as a bonus they work in all planes so very useful to anybody fitting belts in the back of a van.
The yellow wing was taken back off and given the full prep treatment by Johnny;
Followed by black primer;
And while waiting for paints to harden Johnny got on with giving the bonnet the full Darth Vader finish;
Things are really starting to come together now.
My all new film location website is here; www.rewoundandfound.com
Check oot ma flickr page; http://www.flickr.com/photos/route9autos/
For handmade jewellery, go to: http://www.weegemjo.co.uk